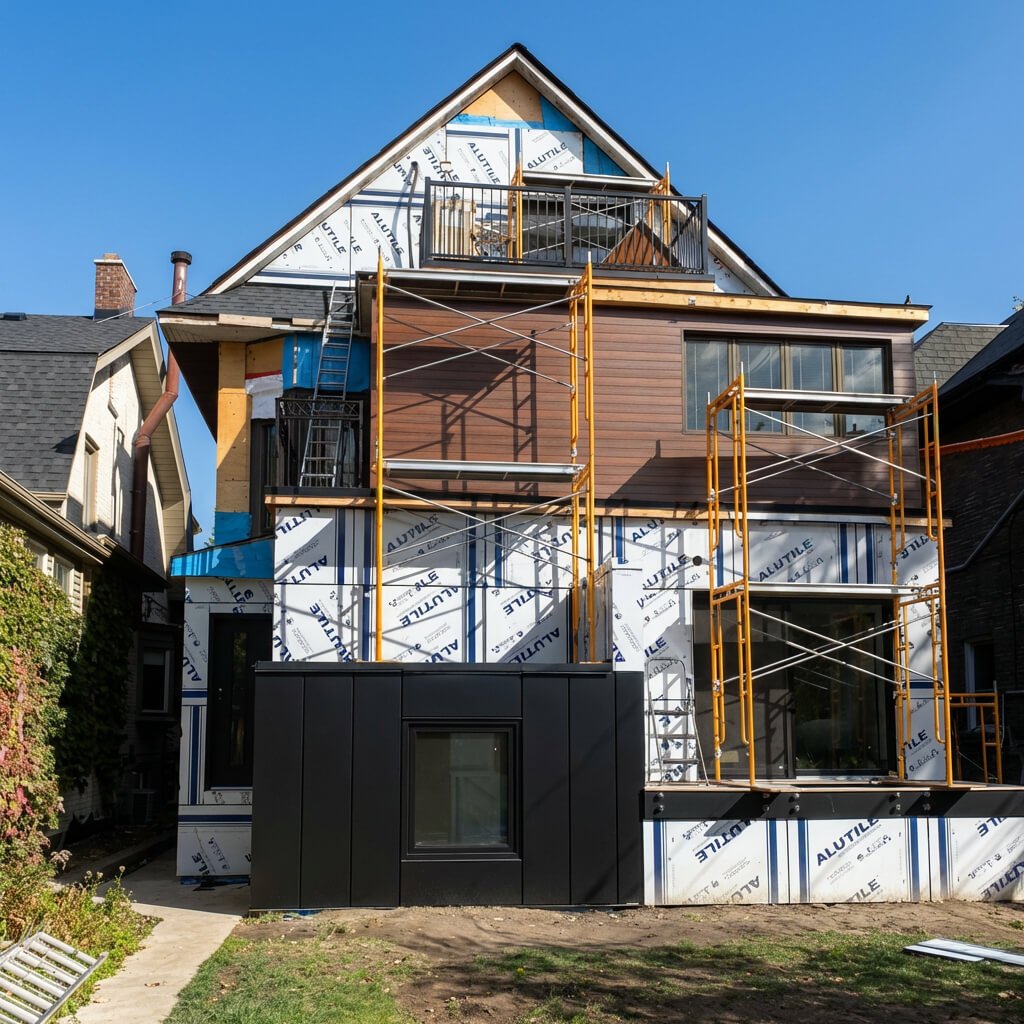
Exterior cladding in Canada is undergoing a massive shift. For decades, standard vinyl and high-maintenance wood were the default choices for residential and commercial facades. Today, builders and homeowners are increasingly turning to modern architectural metals for a much cleaner, longer-lasting finish.
If you are considering this upgrade for your property, understanding the mechanics of aluminum siding installation is essential. Whether you are modernizing a heritage home in the Greater Toronto Area or specifying materials for a new commercial build, knowing how these systems are put together will ensure your project is a long-term success.
As a dedicated Canadian aluminum manufacturer, Vedrex engineers siding and soffit systems from solid 6063-T6 alloys to deliver the warmth of natural wood without the fire hazards or biological decay. In this detailed aluminum siding installation guide, we will walk you through the specialized tools required for the job, provide step-by-step installation instructions directly from our technical manual, and offer clear insights into what you can expect regarding the overall aluminum siding installation cost.
Why Choose Aluminum Siding? Benefits and Styles
Before discussing the tools and techniques, it’s important to understand why builders and architects often choose aluminum siding instead of traditional materials.
The Pros: Safety and Durability
- Non-Combustible Profile: Unlike wood or polyvinyl chloride (PVC), extruded aluminum is entirely non-combustible. It meets and exceeds severe fire safety regulations outlined by the National Building Code of Canada, making it the premier choice for urban residential centers and multi-family commercial builds.
- Freeze-Thaw Imperviousness: Canada’s climate is brutal. Since aluminum does not absorb any moisture, it fully prevents issues like rot, fungal decay, and the expansion that can cause vinyl siding to separate from walls during winter.
- Zero Painting: The era of restaining cedar every three years is over. High-performance sublimated finishes ensure your siding looks identical decades later.

Modern Aluminum Siding Styles
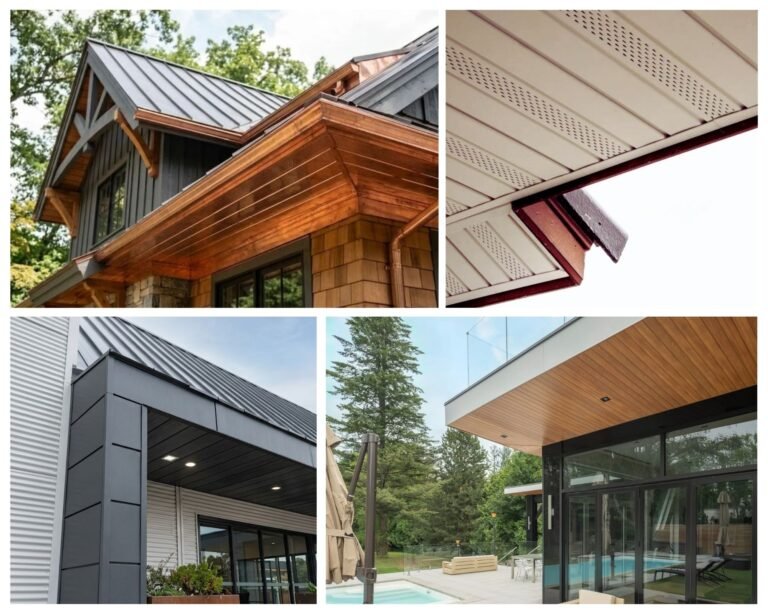
Modern extrusion technology means you are no longer limited to boring, flat profiles. The aluminum siding styles available today offer boundless architectural freedom.
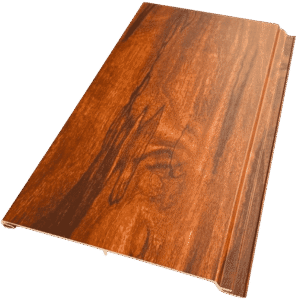
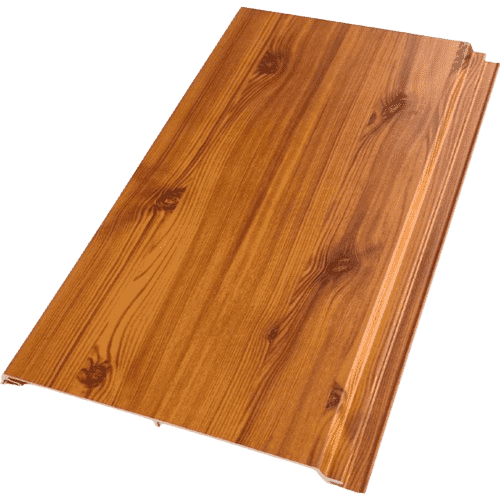
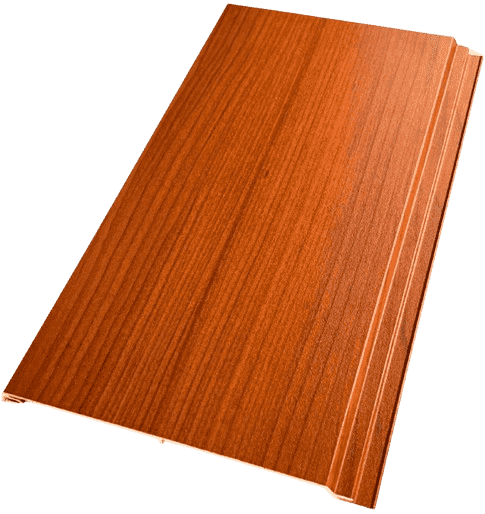
- Woodgrain Sublimation : Advanced powder-coating techniques allow systems like our Woodgrain Aluminum Cladding to flawlessly mimic the organic grain, knots, and warmth of natural cedar, oak, and dark brown without any of the maintenance.
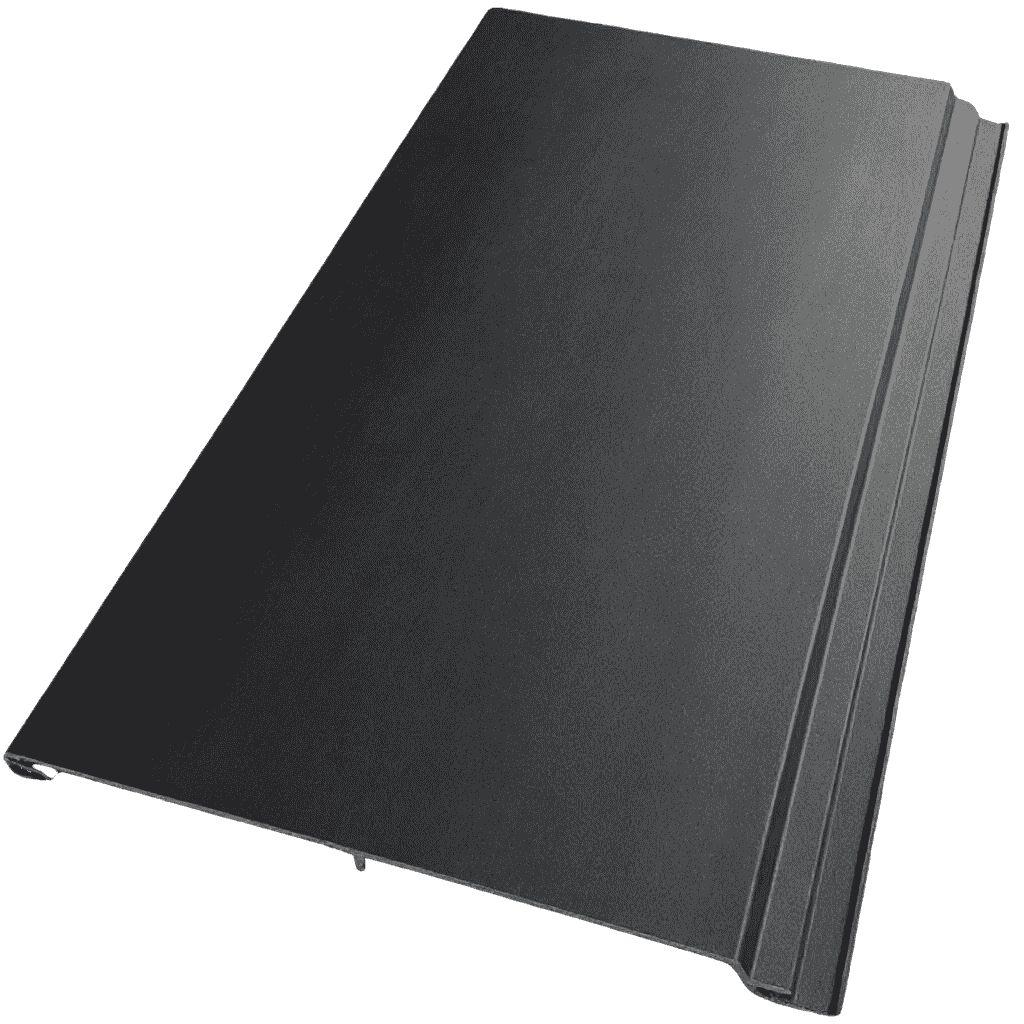
- Textured Solids : From striking Dark Gray Aluminum Siding to deep luxury Black Aluminum Siding, modern solid colors provide builders with the rigid, geometric lines demanded by contemporary architecture.

Planning Your Aluminum Siding Installation
Precision is the hallmark of any successful metal cladding project. When planning your aluminum siding installation, it’s important to accurately assess the building’s shape to order the right trims.
- Measuring Square Footage: Calculate the total square footage of your exterior walls, subtracting major openings like garage doors and bay windows. Always order an additional 10% for material waste and precise cuts.
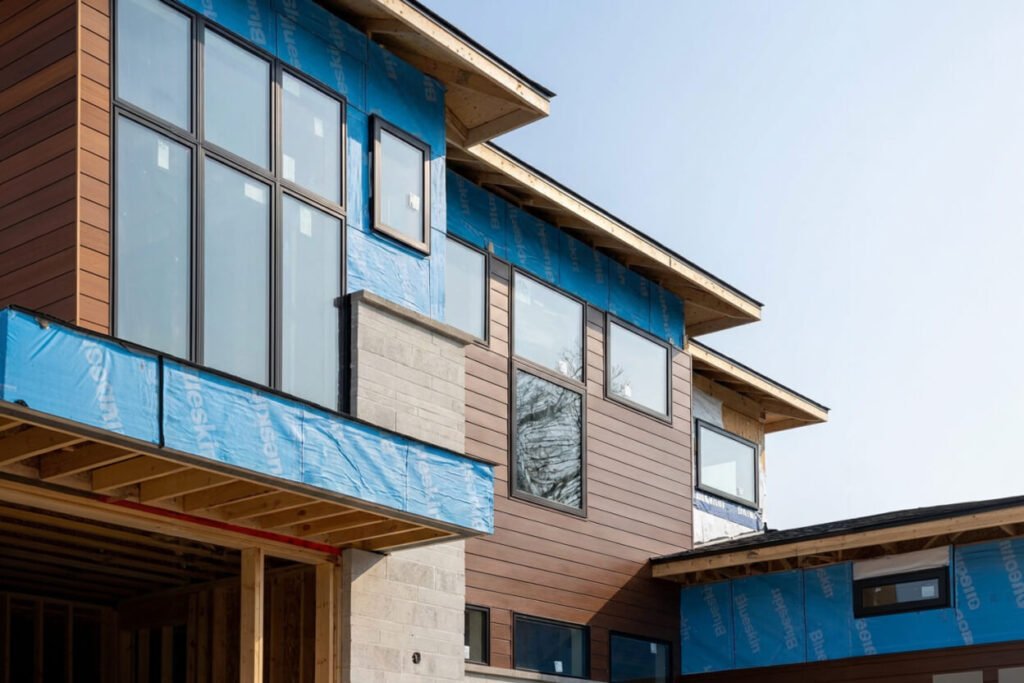
- Assessing Substrates : You must determine early if you plan to install aluminum siding over brick or over older wood sheathing, as this dictates your strap and fastener choices.
- The Thermal Expansion Rule: Aluminum expands and contracts with the Canadian weather. You must mentally map your trim transitions (J-trims around windows, Corner Trims) and plan to leave a 3/16″ (5mm) gap per 19-foot length of siding. The single biggest mistake inexperienced installers make is measuring tight to the trims, paralyzing the system’s ability to breathe thermally.
Tools and Materials Needed
Using standard woodworking tools on architectural aluminum is a recipe for jagged edges and voided warranties. Before beginning, ensure you or your contractor possess the following specialized equipment:
- Miter Saw with an 80T Non-Ferrous Blade: An 80-tooth blade specifically designed for non-ferrous metals is strictly required to achieve clean, burr-free cuts.
- Cutting Lubricant: Essential for cooling the blade to prevent the metal from scorching during cuts.
- Standard Drills & Impact Drivers.
- Laser Levels / 4-Foot Bubble Levels: Crucial for checking the plumb line every 2-3 rows. Planks that drift out of level will mathematically magnify the error by the time you reach the roofline.
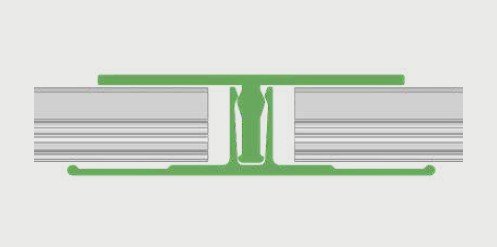
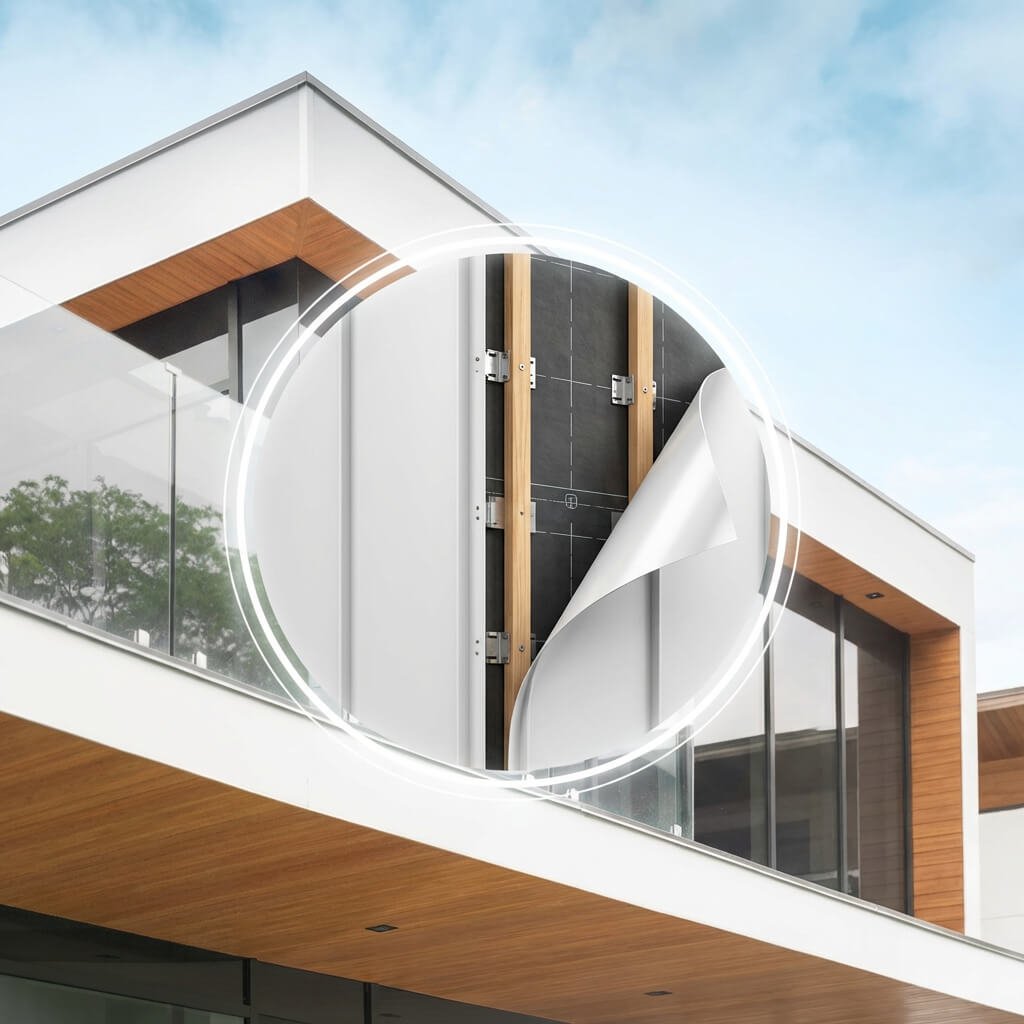
- Vedrex Specialized Mounting Clips: The proprietary clips that allow the siding to snap into place while still sliding horizontally for thermal movement.
- Fasteners :
- For Wood Substrates: #8-10 x 1-1/2″ corrosion-resistant screws.
- For Metal/Masonry Furring: #8-10 x 3/4″ self-drilling screws.
Siding Installation Steps
VEDREX profiles are designed with versatility in mind. Building on a properly prepared substrate (ensuring rot-free sheathing and WRB for wood, or 12″-16″ O.C. furring strips for brick), they can be installed in a variety of configurations to suit different design visions and functional needs:
- Cladding / Siding Applications: Horizontal, Vertical, or Diagonal orientations.
- Soffit / Ceiling Applications: Perpendicular, Parallel, or Diagonal to the façade.
Below, we detail the step-by-step installation methodology for the most popular configurations, broken down simply for homeowners but packed with the technical metrics contractors require.
Useful Link: How to Spot a Good Aluminum Siding Contractor in the GTA

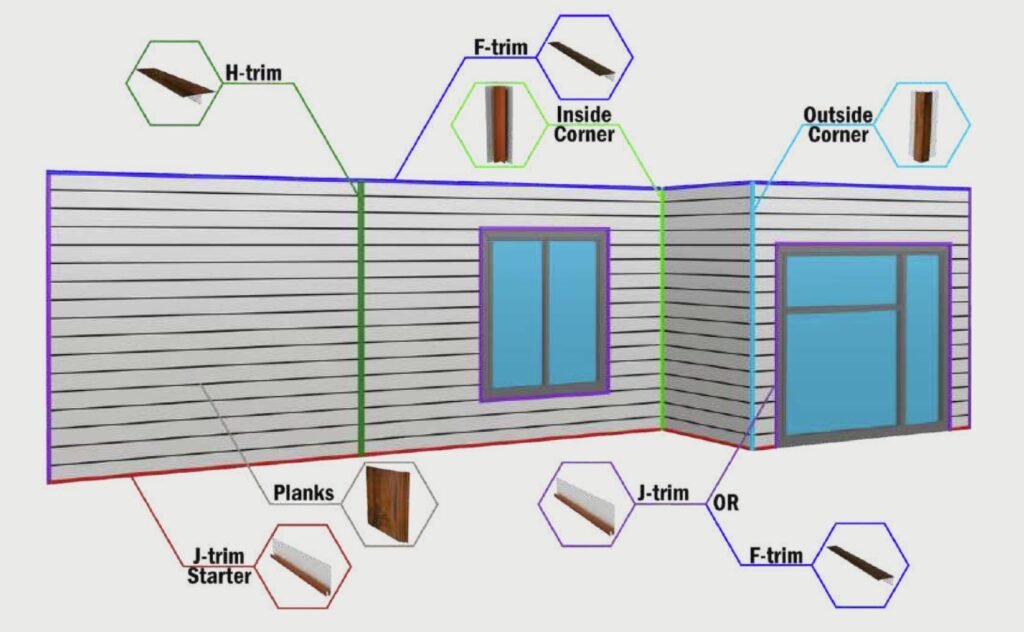
Horizontal Aluminum Siding Applications
Installing planks horizontally is the most common residential approach, offering a classic, clean aesthetic.
Step 1: Install Corner Trims
Measure, plumb, and permanently fasten your Inside and Outside Corner Trims.
Step 2: Mount the Starter Strip
Fasten your base Starter Strip across the exact bottom horizontal plane of the wall, screwing securely into the furring strips every 16″ O.C.
Step 3: Place the Planks
Slide the first extruded aluminum plank into the starter strip and guide it sideways into the corner trim.
Step 4: Snap and Clip
Snap the plank securely into the Vedrex mounting clips spaced along your furring strips.
Expert Tip: Never “hard-fasten” your system by driving a screw directly through the face of the plank. It must glide left and right to accommodate the 3/16″ thermal expansion rule.
Step 5: Level and Ascend
Check the horizontal plane with a laser level every 2-3 rows to ensure you are climbing perfectly straight.
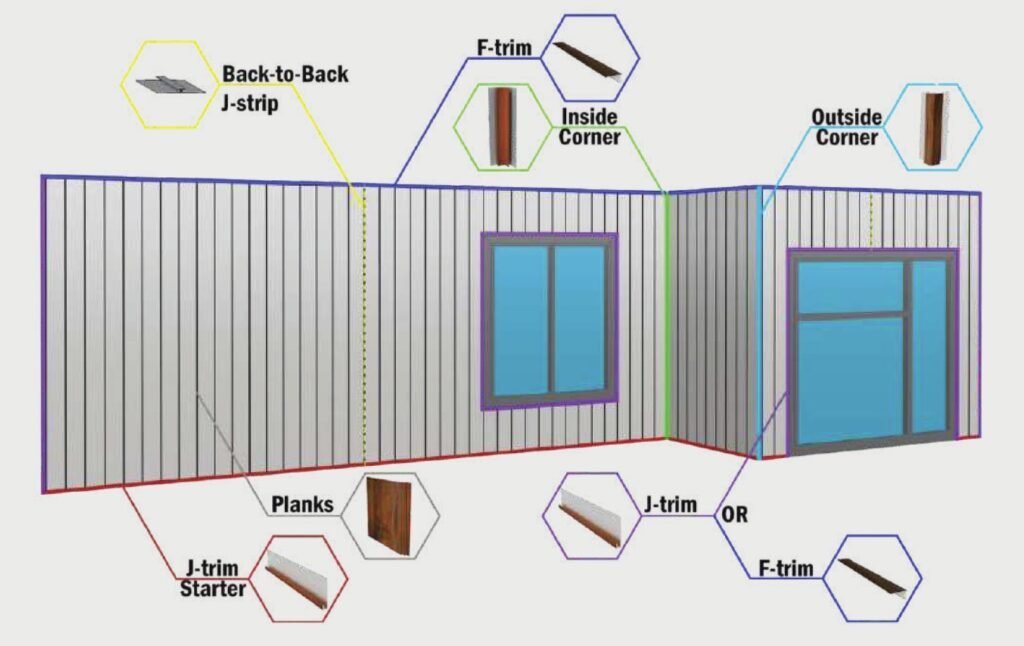
Vertical Aluminum Siding Applications
Vertical orientations (like the popular modern board-and-batten look) require a different structural framework.
Step 1: Horizontal Furring
Your furring strips must run horizontally (perpendicular to the planks) across the wall every 12″ to 16″ O.C.
Step 2: Center the Layout
Install the J-Trim or base leveling trim along the bottom edge. Vertical installations often begin mathematically from the center of the wall (or a dominant corner) to ensure you don’t end up with a wildly narrow, uneven plank at the edge of the house.
Step 3: Vertical Locking
Slide the first vertical plank into the base channel and snap the locking clips along the horizontal furring strips.
Step 4: Check Plumb Regularly
Vertical planks show lean very easily. Use a 4-foot bubble level on the vertical edge of every single plank before securing the clips.
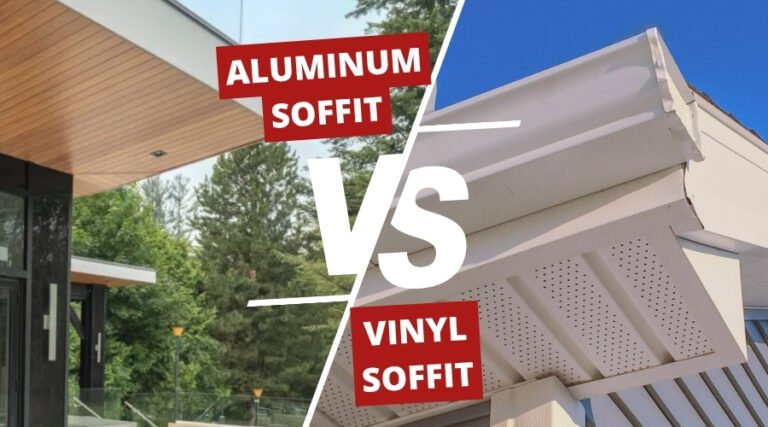
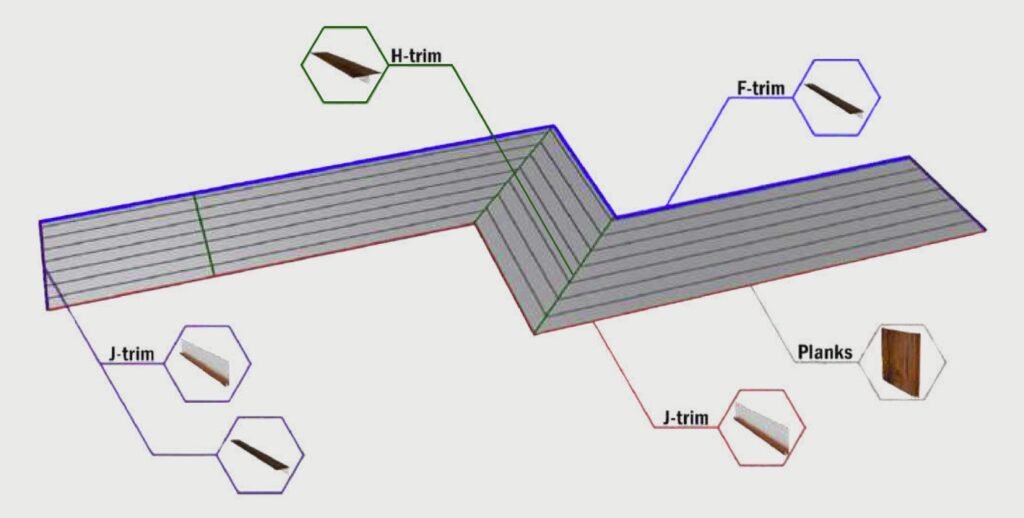
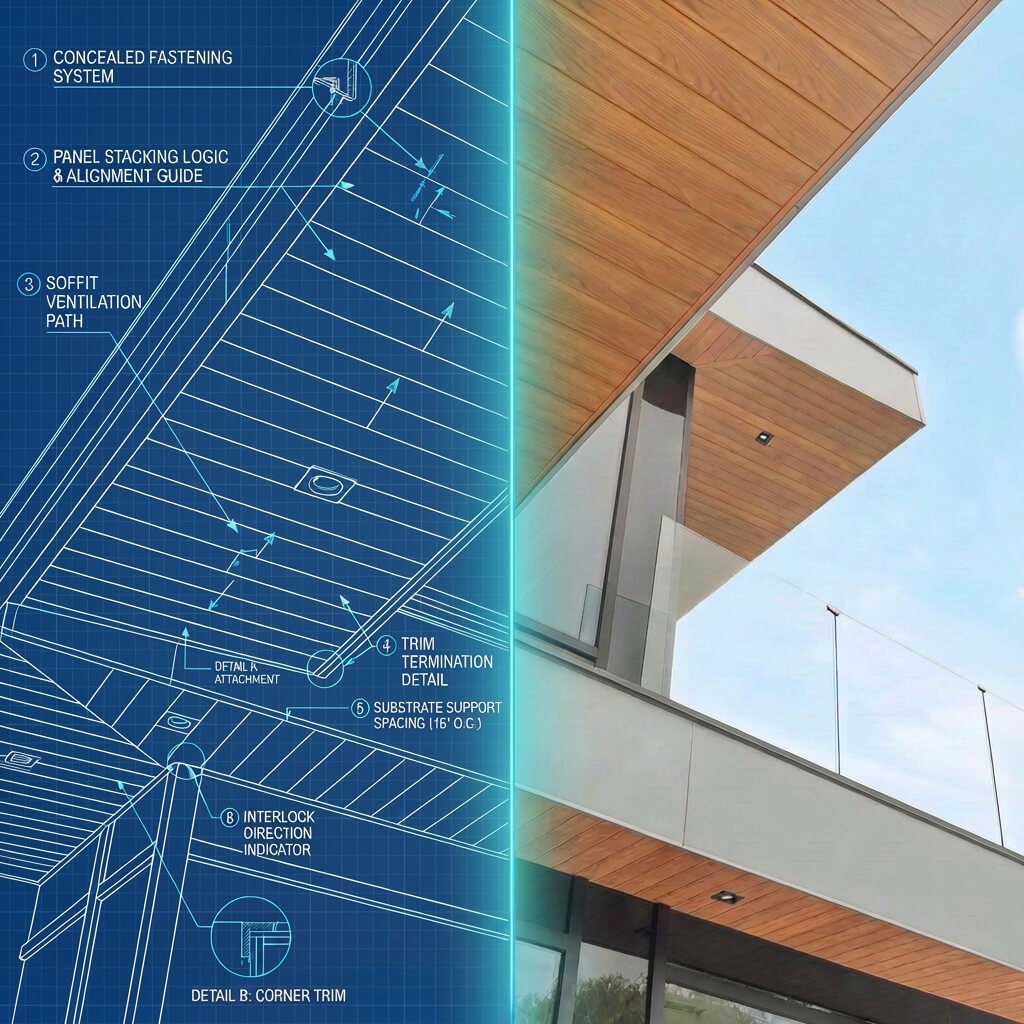
Soffit and Ceiling Applications
Soffits sit underneath the roof eaves or porch ceilings and require special attention to building codes for attic breathing. For aluminum soffit installation, follow the same precision standards outlined below and your local code requirements.
Step 1: Prep the Eaves
Ensure the overhang roof framing (or furring strips) are spaced 12″ to 16″ O.C., running either parallel, perpendicular, or diagonal based on your selected orientation.
Step 2: Install Wall and Fascia Trims
Mount F-Trims or J-Trims securely along the brick/wood wall line and the inner lip of the fascia board. This creates the primary receiving channels for the soffit.
Step 3: Calculate the Venting
Determine the required airflow for your roof. Mathematically alternate Vedrex Vented Soffit planks with Non-Vented planks to hit the Canadian 1:150 or 1:300 building code venting ratio.
Step 4: Insert and Clip
Slide the cut soffit planks horizontally into the receiving wall trims and snap them onto the furring strips above using the mounting clips.

Read the Official Technical Guide
This blog post serves as a high-level overview of the most common applications. For exact engineering metrics, diagonal installation methodologies, H-Trim splicing instructions, and explicit thermal clearance constraints, please read the complete VEDREX Installation & Maintenance Guide on our Resources page.
Inspection, Maintenance, and Aluminum Siding Repair
One of the great advantages of extruded aluminum is that post-installation care is virtually non-existent.
- Yearly Washing : To maintain the 15-year warranty finish, simply wash the siding once a year using warm water, mild dish detergent, and a soft-bristled brush. Never use high-pressure washers, steel wool, or abrasive acid cleaners, as these will permanently strip the protective woodgrain sublimation.
- Aluminum Siding Repair: Accidents happen. If a stray piece of heavy machinery dents a ground-level plank, you do not need to tear down the entire wall. Because Vedrex planks utilize a clip-and-snap architectural system, a professional can simply un-clip the damaged plank via the H-trims and swap in a brand new piece seamlessly.
Aluminum Siding Installation Cost: Factors and Estimates
When evaluating upgrades, understanding the overall aluminum siding installation cost is a primary concern for architects and homeowners alike. If you’re comparing general siding installation cost across materials, note that figures vary by region and design complexity.
- Initial Material Costs: Premium architectural aluminum falls on the higher end of the spectrum compared to entry-level vinyl or generic painted coil stock. This is because you are purchasing precisely engineered, 6063-T6 solid alloy extrusions that have undergone advanced sublimation.
- Professional Labor Costs: Because the installation process requires strict leveling, thermal accounting, and heavy-duty cold-cutting tools, labor generally accounts for 40% to 50% of the total project quote depending on your geographic region and the complexity of the home’s architecture.
- The Lifetime ROI Calculation : Evaluating the cost solely on day one is a mistake. Real wood requires staining every 3-5 years (costing thousands in recurring labor). Furthermore, when comparing Aluminum vs Vinyl Siding in Ontario, vinyl eventually fades, cracks in deep freezes, and requires total replacement. Extruded aluminum demands zero maintenance dollars over a 20+ year lifespan, making it the most cost-effective long-term cladding solution on the market.

Pro Tips for a Successful Aluminum Siding Installation
Before you or your contractor fire up the miter saw, keep these insider aluminum siding tips in mind:
- The Drop Test : If you are unsure if a blade is cutting cleanly, do a test cut on a scrap piece of trim. If the edge features heavy metal burrs or bends the flange, your blade lacks the correct tooth density.
- Never Bend Extrusions : You cannot bend 6063-T6 architectural siding on a standard siding brake. All corners and angles absolutely must be achieved through the engineered corner trims provided by the manufacturer. Attempting to bend the planks will snap the alloy structure.
- No Grounding Required : Unlike continuous corrugated steel barn roofs, architectural aluminum siding consists of independent planks separated by finishing trims. This means the system does not dynamically carry structural electrical loads, and massive exterior grounding networks are generally unnecessary. However, always consult your local Electrical Safety Authority (ESA) codes for site-specific requirements.
Frequently Asked Questions (FAQ)
- Can you install aluminum siding over brick or existing wood? Yes. You do not always need to demolish the exterior. A contractor can strap an aging brick or wood wall with vertical furring strips (spaced 12″ to 16″ on center). This creates a heavily insulated rainscreen gap while modernizing the facade.
- Should I attempt DIY aluminum siding or hire professional installers? Yes, you can certainly attempt DIY aluminum siding installation as long as you follow the manufacturer’s instructions outlined in the installation guide. However, keep in mind that while enthusiastic homeowners can successfully handle the installation, a professional aluminum siding installer can provide valuable assistance. There are multiple factors to consider, such as exact thermal expansion calculations and proper flashing and J-trim layering, which are essential to adhere to in order to ensure your warranty remains valid.
- Can Vedrex systems be applied alongside competitor aluminum siding like Longboard? Vedrex siding and soffit systems possess their own proprietary interlocking structures and clips. While they can geometrically complement the aesthetics of other high-end aluminum competitors on the same building, the physical planks and locking clips are uniquely engineered and are not interchangeable with Longboard or AL13 tracks.
- Does an aluminum siding exterior make a house colder or hotter? No, the aluminum itself serves as a protective weather envelope, not insulation. In fact, because architectural aluminum requires an air-gapped rainscreen installation (mounted on furring strips), it actually increases the energy efficiency of the home by preventing solar heat from transferring directly into the primary wall structure.
- How much expansion space do I need to leave, and why can’t I face-screw the planks? Plan for aluminum’s thermal movement from the start. Leave a 3/16″ (5 mm) gap per 19-foot length at transitions and trims, and never measure tight to trims. Use Vedrex mounting clips so planks can glide horizontally; do not drive screws through the plank face (“hard-fasten”), or you’ll paralyze the system’s ability to breathe and risk buckling.
- What specialized tools and fasteners are required for a clean, warranty-safe install? Use a miter saw with an 80-tooth non-ferrous blade and cutting lubricant for burr-free, cool cuts. Standard drills/impact drivers plus laser or 4-foot bubble levels are essential for alignment. Install with Vedrex specialized mounting clips and the correct fasteners: #8-10 x 1-1/2″ corrosion-resistant screws for wood substrates, and #8-10 x 3/4″ self-drilling screws for metal/masonry furring. Woodworking blades or dry cuts can leave jagged edges and may void warranties.
- What are the key differences between horizontal and vertical installations? Horizontal installs typically use vertical furring (12″–16″ O.C. over brick) with corner trims set first, a level starter strip at the base, planks slid into the starter and corner, then snapped to clips—checking level every 2–3 rows. Vertical installs require horizontal furring (12″–16″ O.C.), a base leveling trim, and often start from the wall center to avoid narrow end pieces; planks snap along each furring course, and you must check plumb on every plank.
- How do I maintain and repair Vedrex aluminum siding without damaging the finish? Wash annually with warm water, mild dish detergent, and a soft-bristled brush to maintain the 15-year finish. Never use high-pressure washers, steel wool, or acidic cleaners. For damage (e.g., a dented lower plank), a pro can un-clip the affected piece via the trims and replace it thanks to the clip-and-snap system, no full-wall teardown required.
- What drives installation cost, and how does aluminum’s long-term ROI compare to wood or vinyl? Premium 6063-T6 extrusions with advanced sublimated finishes raise initial material costs, and skilled installation typically makes labor 40%–50% of the total (varying by region and design complexity). Over time, aluminum’s zero-maintenance performance outperforms wood (which needs staining every 3–5 years) and vinyl (which can fade and crack in deep freezes), delivering superior 20+ year lifecycle value.
Conclusion
Mastering aluminum siding installation is ultimately about respecting the physics of the material. By ensuring your substrate is perfectly strapped, utilizing the correct 80-tooth cold-cutting blades, and religiously leaving the required 3/16-inch thermal expansion gaps within your trims, your project will succeed.
A flawlessly installed Vedrex aluminum exterior elevates a property from standard to spectacular, guaranteeing decades of non-combustible, zero-maintenance performance.
If you’re searching for aluminum siding installation near me, our authorized distributors can connect you with vetted local professionals.
Are you a builder planning your next commercial development, or an architect finalizing specifications for a luxury residential property?